Sticker Sprays Tutorial: Use Random Hue to Create Multicolored Sticker Sprays
This tutorial applies to ArtRage 3 Studio Pro and ArtRage 4.

Many of the sticker sprays use a single color, but sometimes you want to mix it up a bit and get a wider range of blues, or a complete rainbow of color without having to individually change the selected color for every stroke.
This is very easy to do by changing the Random value for Hue in the Spray Variations panel.
Choose A Preset
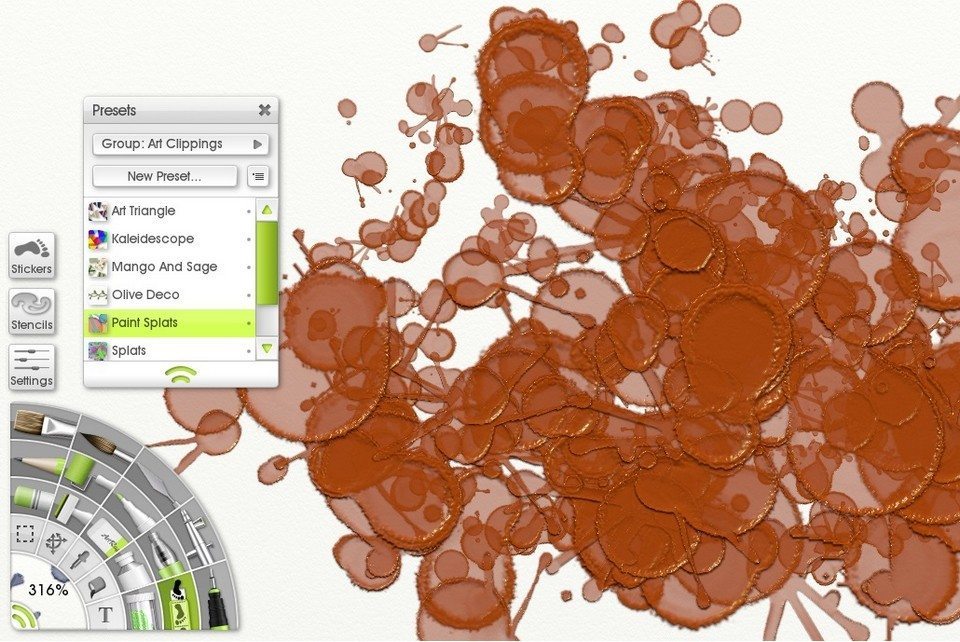
For this example, we’re going to use the Paint Splats preset. This preset uses the active color that you have picked in the color picker and can be found in the Art Clippings group.
Open the Spray Variations Panel
Go to Settings and click the Spray Variations button. This will open the Spray Variations panel, which controls how the sticker spray acts and looks.
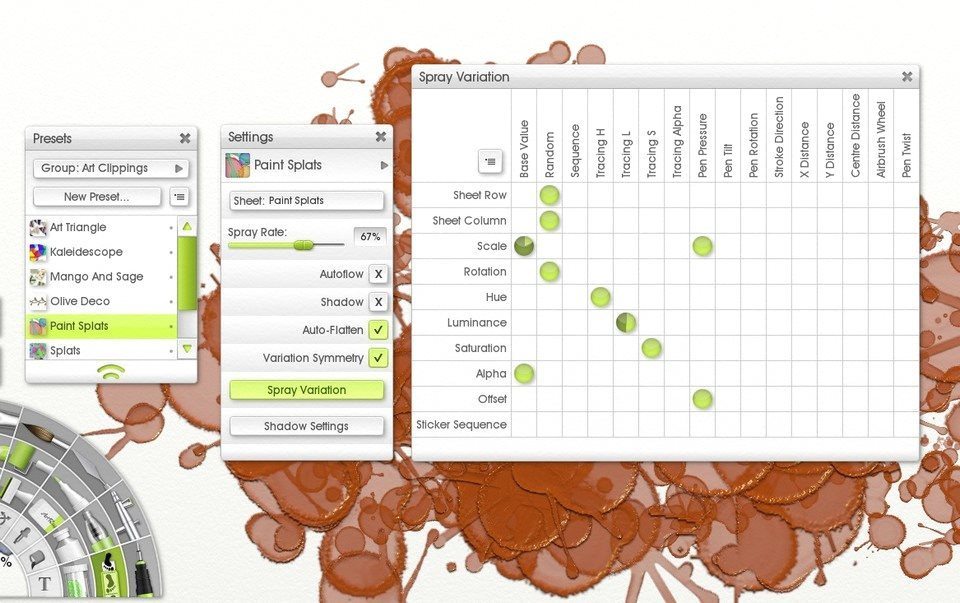
The green circles represent the number value (%) for each property. So a solid green circle represents a value of 100%.
Don’t worry about understanding the options for now, we’re just changing a single value.
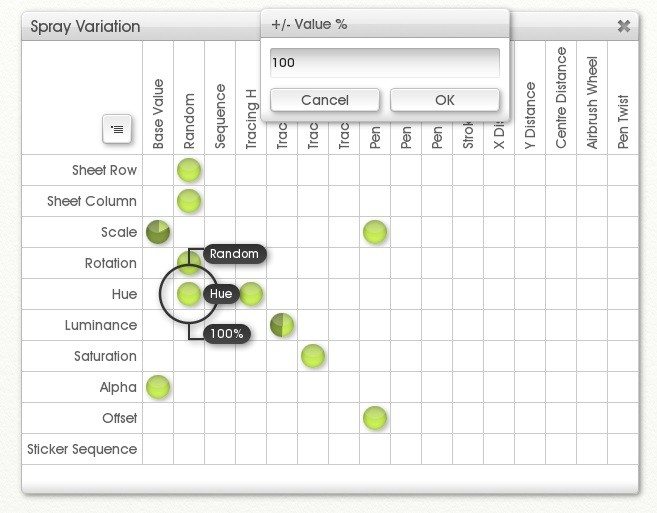
Find ‘Hue’ down on the left, and ‘Random’ along the top. Right click on the empty cell for Random Hue and choose “Set Value”, then enter 100 and click OK. Alternatively, click on the empty cell and drag upwards until the circle is solid green.
Paint!
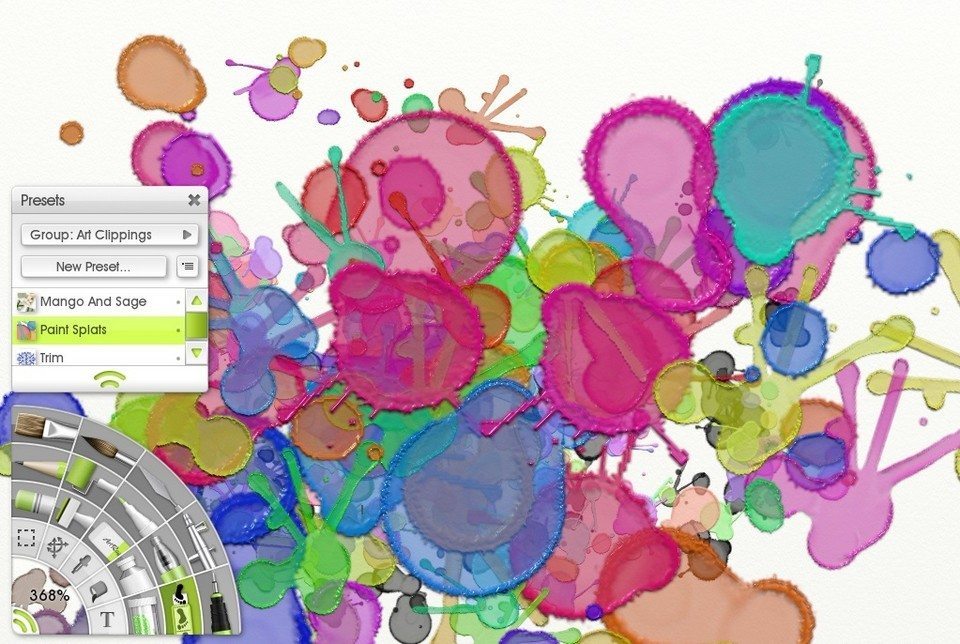
You have now created a randomly multicolored sticker spray. The color (hue) will randomly vary from the entire range (100%) of possible colors as you draw.
Modifying the Multicolor Effect

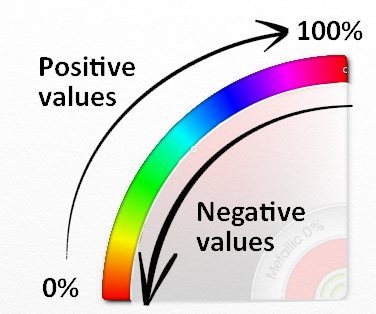
But what if you don’t want a completely random rainbow of colors? What if you just want to vary it a little bit, to get different shades of green, or yellows and oranges only? Then you can just adjust the Random level to get the result you want.
To figure out exactly what kind of result you’re going to get, you need to know how the randomness value is “choosing” the colors. As you can see in the diagram, the ArtRage color picker goes through all the colors of the rainbow from red to blue to green, and back around to red again. These colors could be stretched out into a circle, like they are for the Tint/Tone picker.
The Random value sets how far around the circle from your current color (0%), and in which direction, the randomness goes. Your sticker spray will pick a color randomly from any hue within that percentage. The higher the percentage, the more of the circle of colors is included, and the more colorful your sticker sprays will become.
Negative values go down from Red to Blue. Positive values go to the up from Red to Yellow. They ‘meet’ and start overlapping halfway around the circle, at 50%. At 100%, they both cover the entire circle, and act the same way.
You can start at any point in the circle, so you can use both positive and negative values to get the same effect (You can start combining the Random with other values in the Spray Variations to get different effects, but that is a lot more advanced!).
If you want to get a specific range of colors, just select a hue to the left or right of that range and enter a percentage to cover that amount of distance.
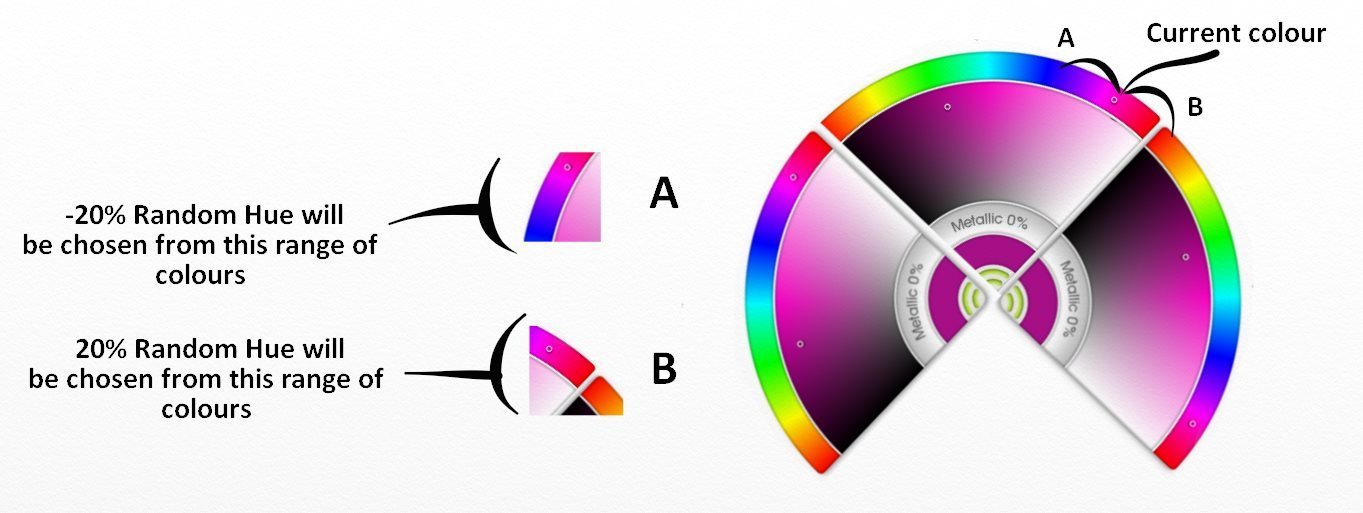
You can use this trick for almost any preset or custom Sticker Spray, once you know how it works.

Notes
- This won’t work for sticker sprays that do not change color when you choose different colors from the color picker. Most stickers are a single color (red) by default, but some images have custom colors. These won’t respond to the Random Hue value in the same way (or at all).
- Some preset Sticker Sprays already use Random Hue values. You can modify or clear the value to change the multicolor effect or get a single color stroke.
- Some have custom color settings that conflict with Random Hue. Any sticker sprays with other values in the Hue row may produce unexpected results as the sticker spray has multiple ‘rules’ for picking colors.
- The brightness and intensity (Luminance and Saturation) of the colors will stay the same. To vary those, you need to change the values for Luminance and Saturation separately in the Spray Variations panel.

If you want to learn more about customising the sticker sprays, check out the links below for more tutorials!
- Learn more about the Spray Variation panel in the manual: Sticker Spray Variation
- More sticker spray tutorials.
- See a table of the effects of different values on the Scale property in the online manual: Sticker Spray Properties: Scale
More ArtRage Tutorials
[fp_carousel width=”940″ height=”200″ items=”5″ num=”-1″ speed=”600″ cat=”Tutorials” orderby=”date” post_type=”post”]For more help with using ArtRage:
Check out the ArtRage 4 Manual.
The list of Art Community Tutorials or previous posts in the Tutorials category.
And don’t forget to check the FAQ section!
You can also drop by our Artrage Forums, or Contact our Tech Support directly.