Cloner
The Cloner is a special effect tool that allows you to replicate paint already on your canvas by setting a Source point then painting in to a new area. The Cloner can be used to repeat existing detail on the canvas such as flowers in a field, or duplicate patterns and colour blends that you have already applied.
The Cloner has the following features:
- Replication: The Cloner precisely recreates paint from its source area at the cursor. This means that it will replace any paint already on the canvas at that point without blending. It also means that the Cloner will replicate any paint wetness or texture from its source area.
- Head Control: The Cloner allows you to soften the edges of its brush head to help blend the replicated paint in with paint already on the canvas. It also allows flow control like the Airbrush.
- Clone Source: All Cloner operations need a source, which is the point from which the Cloner takes paint to replicate.
Settings
Blend Mode: The Cloner allows you to adjust the color of the paint you are drawing with by applying a blend mode as it is applied to the Canvas. Unlike Layer Blend Modes, the blend mode used by the Cloner is applied as it lands on other colors already on the Canvas, it does not change the color of the paint if it is landing on a blank area of Canvas. The Blend Mode will also only apply to paint that overlaps color on the current Layer, it does not change the color of the ink as it passes over color on a different layer. For more general information on what Blend Modes look like when they are used, see the section on Layers.
Opacity: Controls the overall opacity of the cloned paint as it is applied.
Hardness: Controls how hard the edge of the Cloner brush head is. The higher this value the sharper the edge line of the cloned stroke. Lower values cause cloned paint at the edge of the stroke to blend with the paint behind it.
Autoflow: Sets whether the flow of cloned paint is continuous or only occurs when you move. If turned on, paint will be applied constantly while the mouse button is held down. If turned off, paint will only be applied as you drag.
Relative Offset: This defines how the Cloner Source Point behaves. When you paint with the Cloner paint is duplicated from the Source and applied under the cursor. As you paint, the Source Point moves to mirror the motion of the cursor.
If this option is turned on the Source Point stays at the same relative distance from the cursor between paint strokes so that every time you start painting it will be the same offset distance that it was when you defined it. This option is useful if you are duplicating a large area of paint.
If the option is turned off, every time you start painting the Source Point returns to the original location it was when you defined it, regardless of how much the cursor has moved. This option is useful if you want to repeatedly duplicate an area of existing paint in different locations on the canvas, because each time you start a stroke, the Source Point returns to its original, defined location.
Current Layer Only: Sets whether the Cloner replicates paint only from the current layer, or from every layer on the canvas. If turned on, paint from any layer the Source Point passes over will be replicated.
If this option is turned off, the following additional settings become available:
Include Canvas Color: If turned on, this option causes the Cloner to treat the Canvas color as paint and replicate it along with paint from any layers. If turned off, only actual paint is replicated.
Include Current Layer: If turned on, this option causes the Cloner to replicate paint from the layer it is painting on. If turned off, the Cloner will ignore any paint that it finds on the current layer.
Setting Clone Source
All Cloner operations need a Source for the paint to replicate. You can define the Clone Source in one of two ways:
- If you have not already defined a Source, the first time you click with the Cloner on the Canvas your Source point will be defined.
- At any point when using the Cloner, hold down Alt (Windows) / Option (OS X) and click on the canvas to define the Source point.
A small crosshair will be left behind on the Canvas to indicate where the Source point is.
How the Cloner Source Point Moves
As you paint, the Cloner Source Point moves in exactly the same way the cursor moves. For example, if you move to the right, the Source Point will move to the right. Understanding the relationship between the Source Point and the Cursor is important when you are trying to clone large areas.
If Relative Offset is turned on, you can make as many paint strokes as you like to clone an area of paint, because the motion you make with the cursor is mirrored by the Source Point even when you are not actually painting:
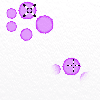
Stroke 1 replicates part of the source area.
In this case the clone source is at the top left, and a single stroke has been made to clone part of the watercolor dots at the bottom right.
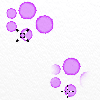
Stroke 2 starts in a different spot but replicates the correct part of the source area relative to the motion of the cursor.
So the second stroke continues to recreate the watercolor dots in the bottom right corner.
If Relative Offset is turned off, you must replicate the entire area of paint that you want to clone in a single stroke because the Source Point will reset every time a stroke ends.
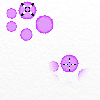
Stroke 1 replicates part of the source area.
This looks the same as a Relative stroke because the Relative Offset toggle is only relevant between strokes, the tool behaves the same way during a single stroke regardless of the Relative value.

Stroke 2 clones form the same source as stroke 1 even though my cursor is in a different position, so the Source Point is not in the same position relative to the cursor and I cannot complete replication of the source.
Instead, the watercolor dots are repeated again at the new stroke point.
This can be useful if you want to create multiple clones of a smaller object.
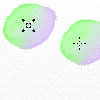
Stroke 1 replicates the entire object you want to clone.
Remember that you need to make sure that you complete the clone in a single stroke.
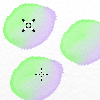
Stroke 2 resets the Source Point to the original spot and you can just paint a new stroke to replicate the entire object again.
You can repeat this as often as you like.