ArtRage for iPad Painting & Drawing Tools
Selecting Tools
Tools are selected on the left hand side of your iPad using the Tool Picker. In the bottom left corner is a Tool Pod that shows you the currently selected tool. Tap this pod and the Tool Picker appears. Tap on a tool in the picker to select it.

Shortcut: If you tap and hold on the tool pod the tool picker appears – drag upwards over the tool you want to select then let go. The tool is selected and the tool picker vanishes again.

Cloner: Replicates paint that is already on your canvas by setting a source point and then painting into a new area.

Fill Tool: Fills bordered areas on your canvas. Tap in an area and it will be filled with the current color.

Colour Sampler Samples color from the canvas. Tap and drag on the canvas and the color beneath the sampler will be selected as the current color.

Eraser: Erases all kinds of media from the canvas. If there’s thick paint the eraser thins the paint before removing it.

Glitter Tube: Sprinkles particles of glitter on the canvas with optional shapes for texturing.

Gloop Pen: Creates a smooth flow of ink that spreads on the canvas. Tap and hold to start the flow. The slower you drag, the more ink is spread on the canvas.

Pastel: Places dry strokes of wax or chalk on the canvas that can be smudged and break up easily on canvas grain.

Felt Pen: Simulates markers and highlighters with bold, colorful strokes.

Inking Pen: Fine line inking pen for detail work. Turn up ‘Smoothing’ and the lines autosmooth when your stroke ends.

Pencil: Fine pencil strokes with a adjustable softness for shading, and a high precision technical pencil.

Paint Tube: Lays down thick lines of paint that can be smeared and blended with the palette knife or other tools.
Roller: Places broad strokes of evenly applied paint. The higher the Pressure, the more the paint breaks up on the canvas as the roller picks it up as it passes.

Palette Knife: A variety of blenders for smearing, smudging, and blending paint on the canvas.

Airbrush: A fine mist sprayer that applies color without flattening or spreading the texture of paint already on the canvas.

Watercolour: Paints delicate strokes of wet pigment that blend with other paint and react to paper wetness.

Oil Brush: Applies strokes of oil with varying thickness. Paint on the brush runs down over time but you can keep applying the stroke to pick up other pigment and blend it on the canvas.
Tool Size
When the Tool Picker is open the size of the current tool is displayed in the toolbar underneath. To change tool size you can either:
- Tap the Tool Size button and enter the size you want manually.
- Tap and drag off the Tool Size button – A curved slider appears that you can use to set tool size. When you release the drag, the slider vanishes.
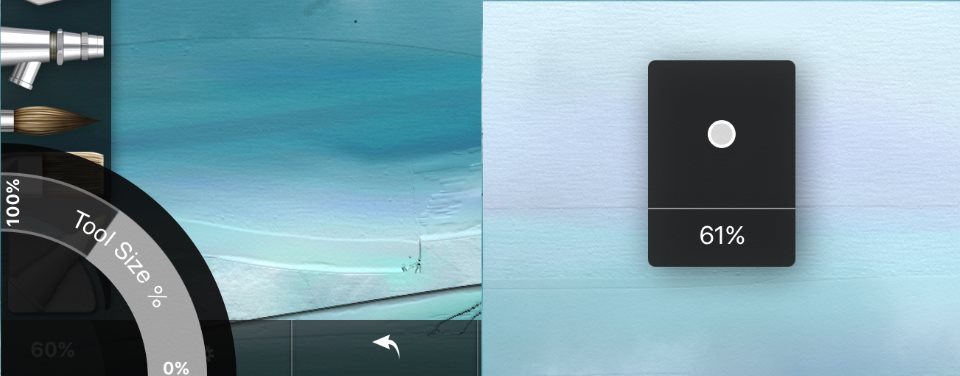
Shortcut: Tap and drag up and down with 3 fingers on the canvas to change the tool size.
Tool Settings
The Tool Settings panel lets you change the properties of the tool you are using. Tap the Settings button on the toolbar at the bottom of the screen and the settings panel appears.
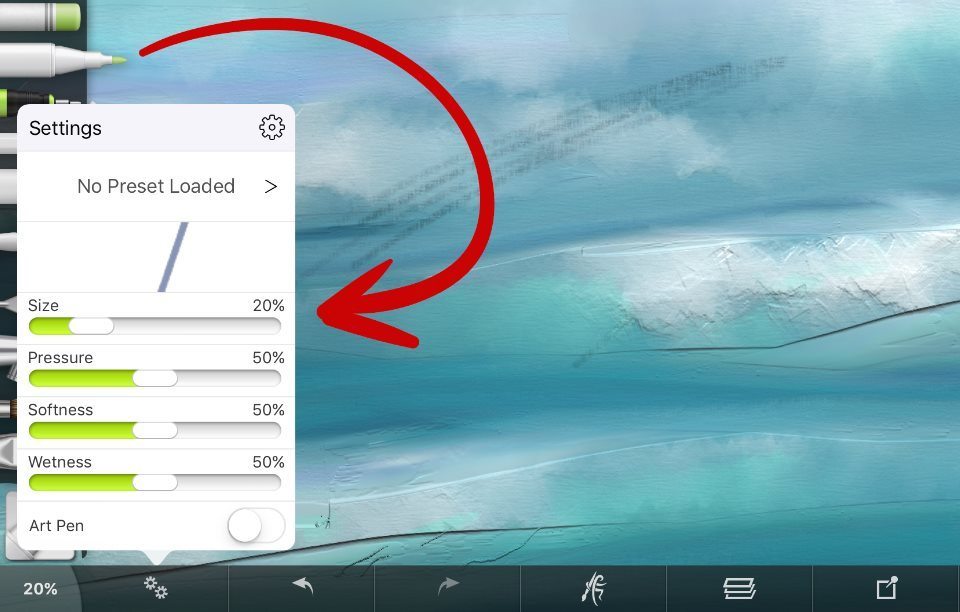
The top of the Settings panel shows you if you have a Preset loaded. If you do, the Preset’s preview image and name are displayed at the top. Tap this area to pop up a list of available presets.
Beneath the preset indicator is a preview of how the tool will look when you use it on the canvas. As you change the tool settings this preview updates so you can see what kind of paint you will be applying.
Beneath that is a set of sliders and other controls that let you adjust the properties of the current tool.
Tip: Think of each tool in the Tool Picker as a basic ‘type’ of artistic tool. The Tool Settings panel lets you work with different varieties of those types. For example if you are using the Oil Brush you might want thick oil paint (set the Thinners slider to a low value) or heavily thinned oil paint (set the Thinners slider to a high value).
Tool Presets
Tool Presets store the settings of a tool so that you can recover them quickly. To select a preset, tap on the Preset Area at the top of the Tool Settings panel and you will be given a Preset Picker that lets you browse the presets you have available.
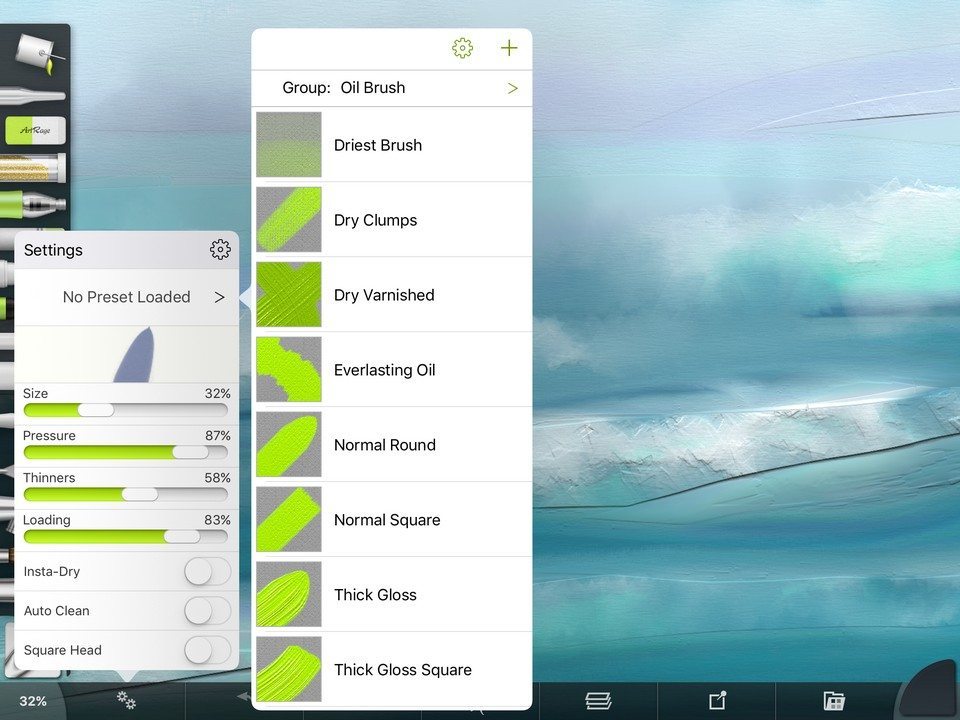
When you select a preset, all appropriate tool settings are updated to the values stored in that preset. Note that some presets do not update the Size of the tool (a Dry Oil Brush can be any size, for example) and other presets will change the current Color selected (the Charcoal presets for the Pastel tool will change the color to black for example). Default Presets which don’t change the color will be a bright green.
When you change settings in the Tool Settings panel, the currently selected preset is cleared – Because the preset is a collection of settings, adjusting your settings means that preset is no longer active. The exception to this is Size, which can be changed without clearing the preset.
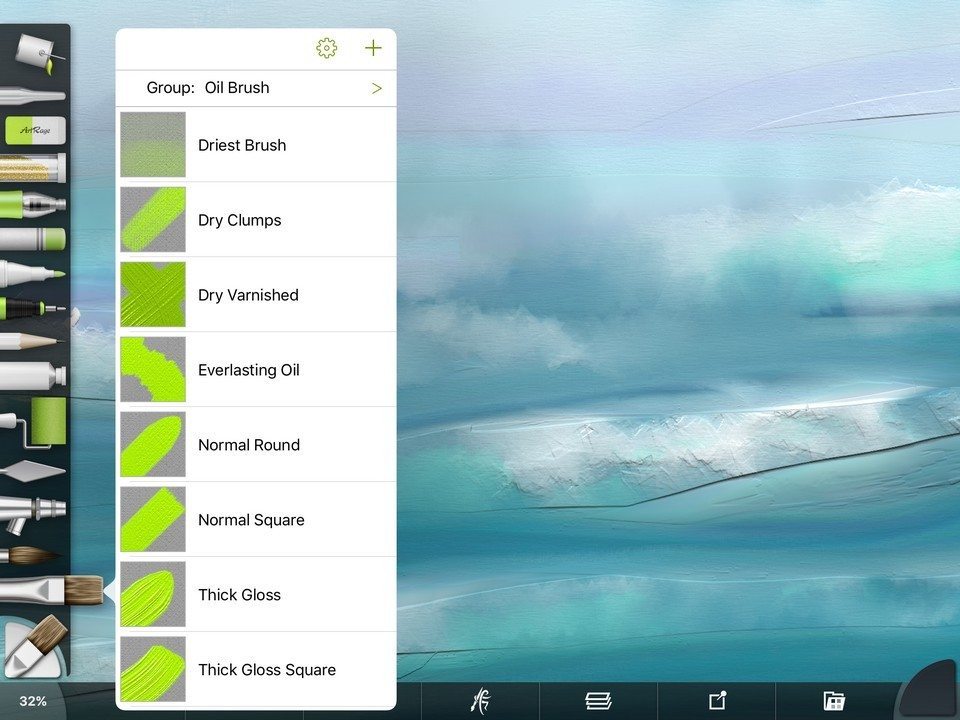
Shortcut: When the Tool Picker is open you can tap and hold on a tool to open the Preset Picker for it. Select the preset you want and it will become active.
Adding Presets
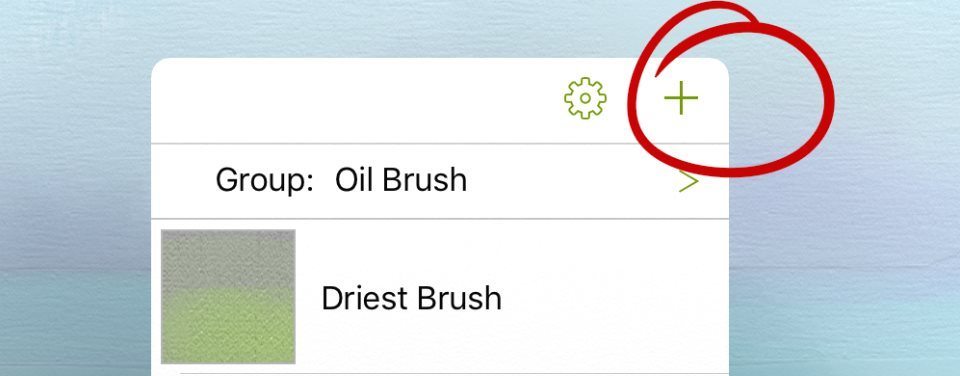
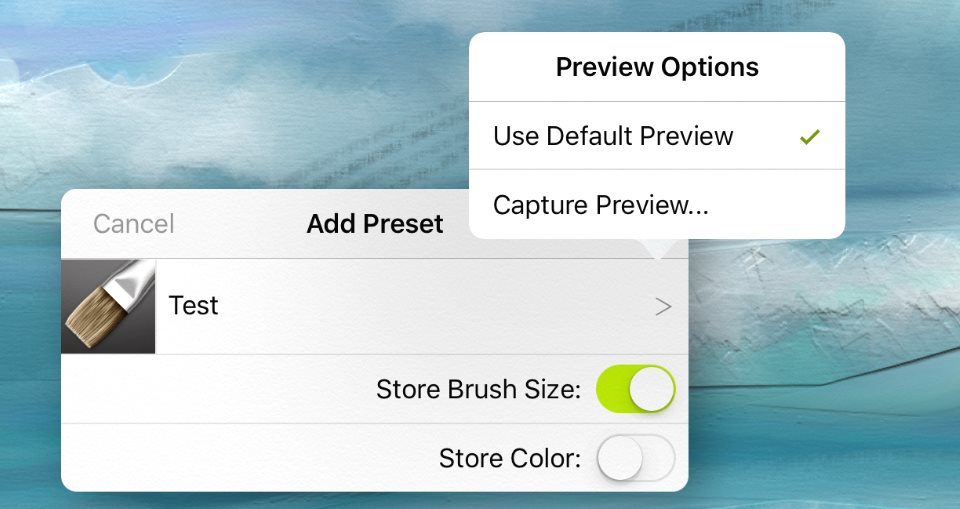
When you tap the + button in the Preset Picker you will be given the opportunity to store your currently active tool settings as a preset, including size and tool color if you wish. You can name the new preset and pick a group for it to be added to. You can also choose to sample a preview for it from the canvas.

Undo and Redo
Undo and Redo let you step backwards through the paint strokes you have made to undo errors. When these functions are available their buttons will light up on the toolbar at the bottom of the screen.

Note: Undo data is only stored while the app is open. If you close ArtRage completely Undo information is discarded.
Hide All Menus
You can shrink all the menus down into small tabs. Tap on the current selected tool and color in the corners to close each those menus, and on the screen with three fingers to hide the taskbar.
Tap the little arrow button or the corner pods showing the current color and tool to get the menus back for each item!