The Oil Brush Tool

The oil paint is probably the tool that ArtRage is best known for, and it’s the first tool most users try when they open the program. It’s definitely one of the most fun painting tools in the program, and according to almost every review we’ve read, we have the most realistic oil paints in any of the digital art program on the market.
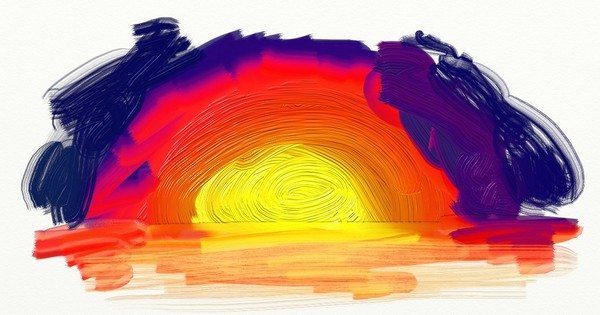
General Tips:
- The default ArtRage canvas is well suited to just jumping in with the oils, but it’s often worth experimenting with different canvases.
- Turn on Real Color Blending (Tools > Color Options in ArtRage 4) for the best color mixing effects.
- The oils are generally not a very delicate tool. If you’re trying to actually draw, use a different tool.
- If you find the oils are a bit too heavy and uncontrollable for you, try reducing the loading and pressure and increasing the thinners.
- The Palette Knife and the Paint Tube both offer different ways to apply oil paint, so it’s worth experimenting with them at the same time.
(Click above to play video)
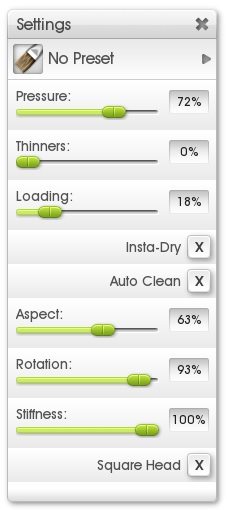
About the Tool Settings
Stroke effects
- Pressure
- Rotation
Brush shape
- Aspect
- Square Head
- Stiffness
Paint properties
- Thinners
- Loading
- Insta Dry
- Autoclean
(Click above to play video)
Pressure
Pressure lets you roughly control the size and how much the brush varies based on the pressure you apply with a stylus.

- Imagine you’re lightly brushing, or forcefully pushing, your brush down on the canvas. Bristles are going to splay out and it will affect everything you try and do.
- Brushes are flexible, so you’re going to get variation with every stroke.
- You can get small strokes with high pressure, but it’s really tricky.
Loading
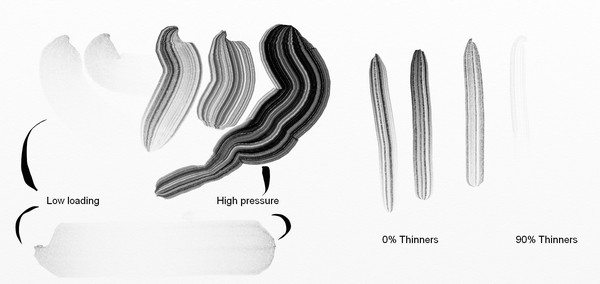
Loading is how much paint is loaded onto your brush, and therefore, how long your brush strokes can be before running out of paint.
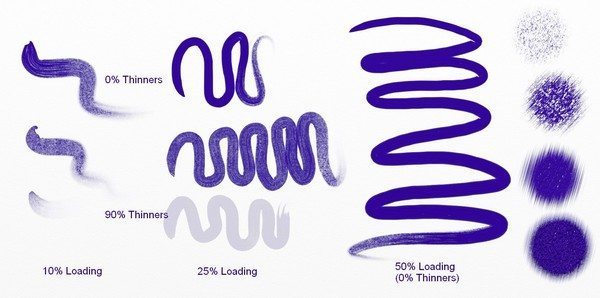
- When the paint is running out is when you get to see the best texture effects from the canvas
- Very low loading is awesome for dry brush effects.
- You can get stippling effects with low loading (and high Stiffness also helps)
- The amount of loading you need for a certain length stroke will depend on the size of your brush and the amount of canvas space you’re using (the length will be the same, but it will look very different if you’re drawing on a 500 pixel canvas compared to a 5000 pixel canvas).
- 100% Loading is basically infinite paint
Thinners
Thinners control how much solvent (’oil compatible water’) you are using in your paint.
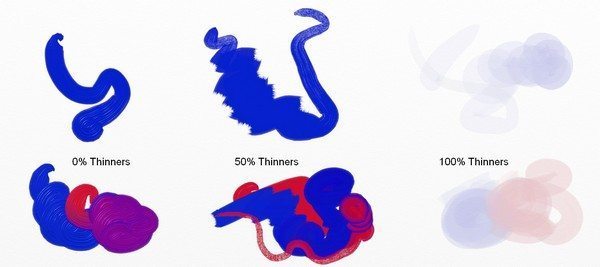
- Boosting the thinners up to around 50% will mostly ‘flatten’ the paint, so you can get rid of the dramatic texturing from the brush bristles (because diluted paint doesn’t hold texture).
- Boosting it up to 75%+ will make the paint translucent, and allow you to start layering colour
- The higher the amount of thinners, the less readily the paint will blend (because there’s less paint being piled onto the canvas)
- Your brush will still pick up any thick paint as it passes by. Thinners can be good for blending existing paint more smoothly.
Insta-Dry
Insta-Dry automatically dries the paint.
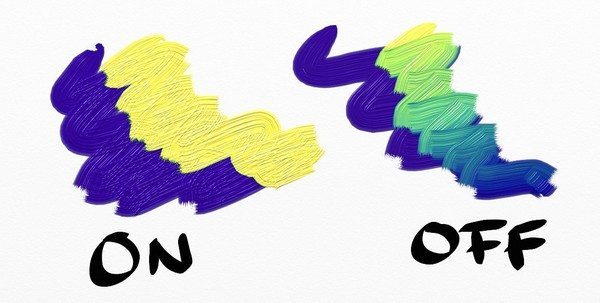
- All existing paint will ‘act’ dry when you paint over it
- The current stroke will overlap itself using the ‘Add’ bump blend mode, so you’ll get some extra texture
- Turning Insta-Dry off will let you mix up paint again – it only applies to the current stroke, rather than changing the entire painting.
Auto Clean
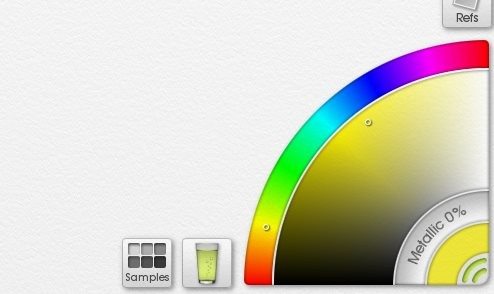
Auto Clean will toggle whether your brush automatically cleans itself when you lift it or whether it stays dirty and keeps using the mixed colour.

- You can manually clean your brush with auto clean off by clicking the water glass icon that appears next to the colour picker
- You may need to click several times to get back to the original colour
Aspect
Aspect is the ‘shape’ of the brush strokes.
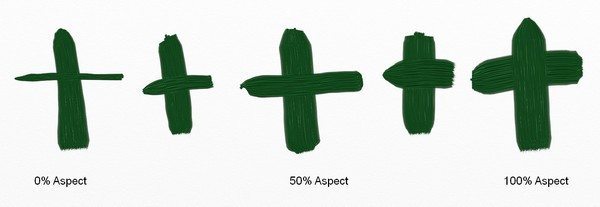
- It acts the same way as Aspect for the Ink Pen
- 0% Aspect has one very thin edge and one very large flat side. 100% Aspect is completely round.
- Use Aspect combined with Square Head to create specific brush types
Square Head
Square Head toggles the brush between square and round.
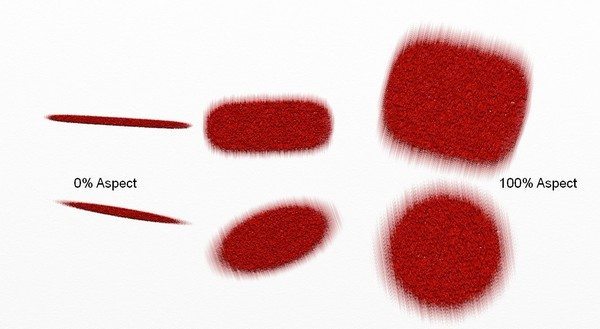
- Use Aspect at the same time to get exactly the result you want
- Pressure and Loading will also affect the appearance
Rotation
Rotation is the default angle that your brush starts at.
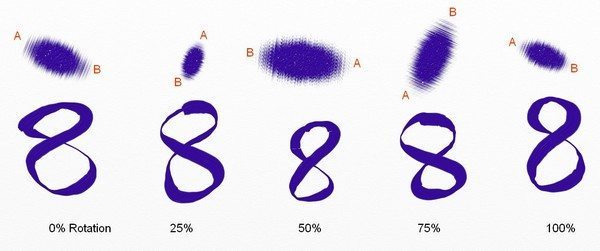
- You won’t see visible Rotation at 100% Aspect (round brush), so make sure to set Aspect to a lower value.
- Oil brush rotation changes as you paint; the rotation value is just the default starting point.
- There’s not really a lot of difference between flipping the brush 180 degrees and the full 360 degrees… unless you have a dirty brush (with auto clean off), or are using very specific settings.
- This can be controlled by barrel rotation of the stylus, if you’e got a fancy stylus, but the two effects can stack in interesting ways.
Stiffness
Stiffness affects the texture of the bristles and how soft or stiff they are.
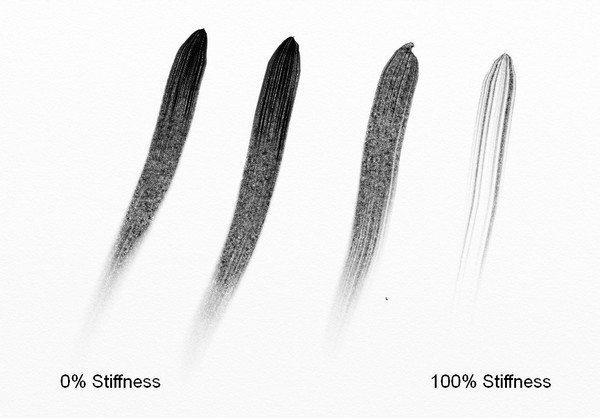
- 0% Stiffness is the default brush in any edition without this setting
- High stiffness is a great way to get dramatic bristly strokes
- Use Stiffness for better dry brush effects and stippling
- The bristle effects become more obvious if you play with thinners, loading, pressure and canvas texture
Looking for more tips?
Browse the guides over on the right or head to the tutorials page for more advanced tips.